There are times that your Android phone might be malfunctioning,
and it will require you to clean up the phone memory by performing a hard
factory reset on your Android device. This tutorial is going to show you how to
quickly and easily do that in few steps.
and it will require you to clean up the phone memory by performing a hard
factory reset on your Android device. This tutorial is going to show you how to
quickly and easily do that in few steps.
It is just in five easy steps, and It will be advisory to
follow me carefully.
follow me carefully.
How Can I Format My Android Phone?
1.
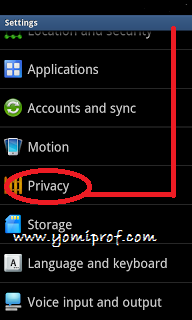
From you device, go to Settings ==> Privacy
From you device, go to Settings ==> Privacy
2.
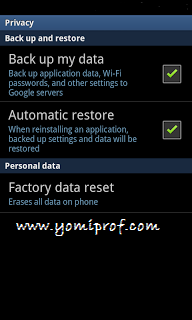
Check “Back up my data” and “Automatic Restore
Check “Back up my data” and “Automatic Restore
3.
Proceed To Factory Data Reset
Proceed To Factory Data Reset
4.
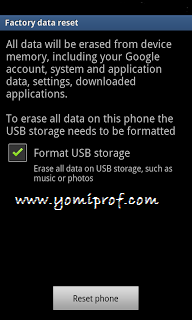
Read the information that will be displayed your screen just to make sure you understood
what you’re about to do then tick the check box for Format USB storage
to clean everything then click on the Reset phone button as seen
on the image above.
Read the information that will be displayed your screen just to make sure you understood
what you’re about to do then tick the check box for Format USB storage
to clean everything then click on the Reset phone button as seen
on the image above.
5.
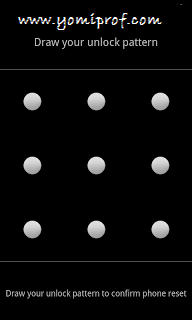
Before it finally erase everything, you will get
one more info displayed on your screen to confirm the reset. Just click on the Erase everything button
to begin the format.
Before it finally erase everything, you will get
one more info displayed on your screen to confirm the reset. Just click on the Erase everything button
to begin the format.
Your device will then perform the factory reset and it will
automatically reboot itself. When it finishes restarting, your Android device
will be clean and as good as new. You can then begin setting it up and install
the apps that you want from Google play, until you are satisfied. This is one
of the shortest and easiest tutorial for Android users so far.
automatically reboot itself. When it finishes restarting, your Android device
will be clean and as good as new. You can then begin setting it up and install
the apps that you want from Google play, until you are satisfied. This is one
of the shortest and easiest tutorial for Android users so far.


Prof, thank you so much for this update, this is a good quick tutorial. I tried the Etisalat Magic Sim and it worked perfectly on my Blackberry phone. 30hrs gone, and it's is still working. Even if it stop working now, i have tested it and it worked fine for me. Tanks a million.
@YOMI, Yesterday, i tried the etisalat magic sim too and its working, but they gave me a message that i have subscribe for one day blackberry plan and that it will expire today wat will i do?
However, can you think of any alternative operating systems that are designed for low-powered devices with limited screen real-estate? If you answered "Android" — full marks. Here's how to run an x86 port of Android on your netbook. Moviles android baratos
my andronoid phone is locked. disabled the internet access before get locked .. now it was asking me like enter mail id and password for unlock .. no. of times i entered but with out internet it wont work .. any solution for this without formating ? kindly help me
i had the same problem . you dont have to reset your phone and lose all your data. you must enable mobile data on your phone, you can do it even when your phone is locked by enabling data network mode.
@blog, i don't know if you enable usb debugging before the device what locked but if you do, follow this steps below
==> Install Android SDK on your PC (You can get it here )
==>Connect the device with USB cable to the PC
==>Install USB drivers for android device on PC (Update drivers using this folder
==>Open the command prompt (cmd) in Windows
and Change directory to the android SDK platform tools (cd C:Program FilesAndroidandroid-sdkplatform-tools)
Type following commands in cmd
adb devices (verify device is identified by pc. If not reconnect device and try again. it should display “device” with a serial no)
adb shell
cd /data/data/com.android.providers.settings/databases
sqlite3 settings.db
update system set value=0 where name='lock_pattern_autolock';
update secure set value=0 where name='lock_pattern_autolock'; (for some devices update “system” is enough but I had to update “secure” too)
update system set value=0 where name='lockscreen.lockedoutpermanently';
update secure set value=0 where name='lockscreen.lockedoutpermanently';
.quit
exit
adb reboot
Now your device should be unlocked. If not please follow this link to learn about simple but precise other steps here
Before you do any of this bring up the dialer and put in *#9900# and hit on delete dump files then scroll to bottom and exit. Then check your devices memory